
目次
背景
こんにちは。 かりんとうマニア(@karintozuki)です。
今日はだいぶニッチですが、Googleが提供しているSpreadsheetのAPIに
androidアプリからアクセスする方法を紹介します。
Google APIにandroidアプリで使ってみる
GoogleはMapやGmailなど様々なサービスを提供していますが、
それぞれにAPIがあったりします。
今回は例としてGoogle DocumentのSpreadsheetにアクセスしますが、
もちろん他のサービスのAPIに対しても使えます。
これらのAPIをうまく使うことで
面白いアプリが作れるかもしれません。
Google APIの設定
まずはSpreadsheetにアクセスするためのGoogle APIを用意します。
SHA-1ハッシュの取得
APIを利用するに当たって、SHA-1ハッシュというものが必要になります。
Android Studioからterminalを開きます。
以下のコマンドでハッシュを表示します。
1 | keytool -list -v \ |
パスワードを聞かれますが、デフォルトのパスワードはandroidです。
表示されたSHA1を控えておいてください。
またGradleのタスクからも呼び出せます。
個人的にはこっちのが簡単です。./gradlew signingReport
その場合は複数表示される中からVariant: debugとなっているものを使ってください。
APIの設定
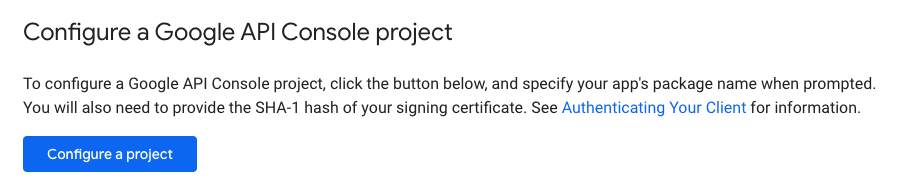
Google API ConsoleからAPI用のプロジェクトを作成します。
https://developers.google.com/identity/sign-in/android/start-integrating
ここのページの真ん中くらいから青いボタンを探してください。
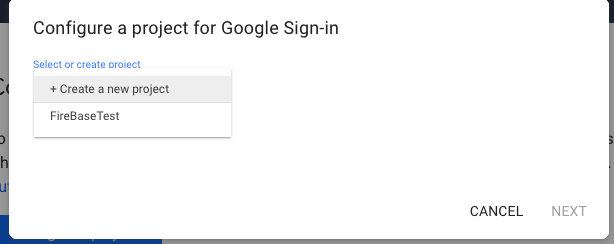
プロジェクトを新規作成します。
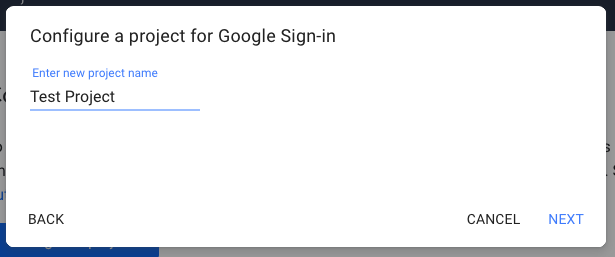
プロジェクト名を入力します。
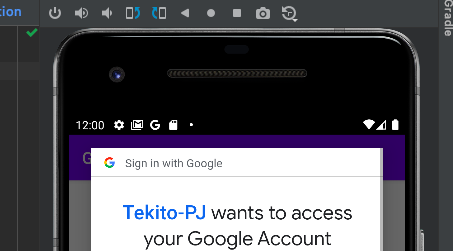
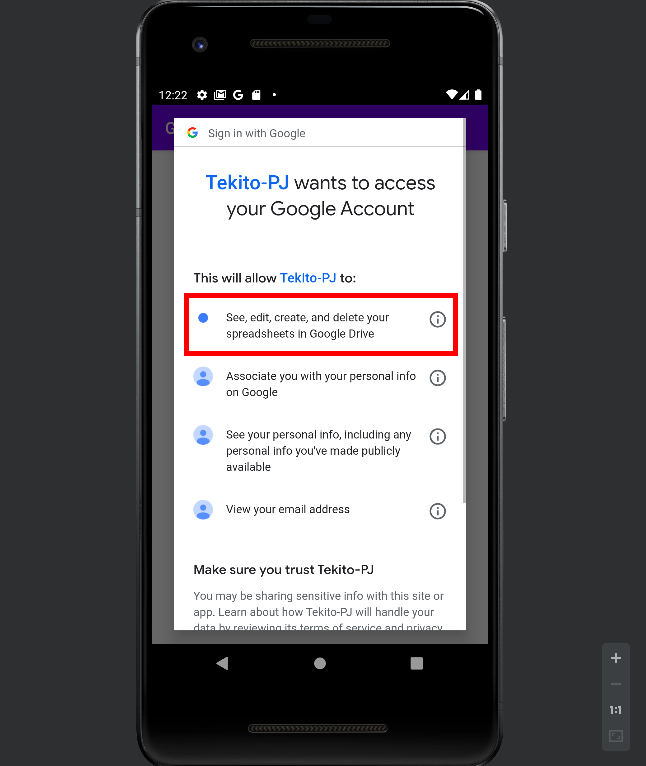
次にプロダクト名を聞かれます。
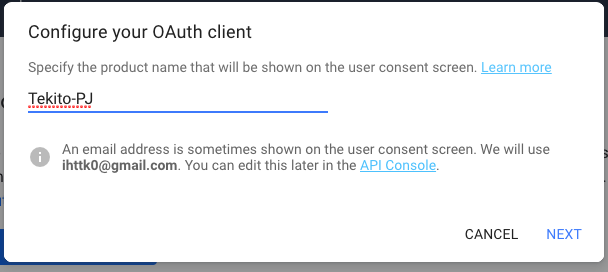
ここで指定した名前が
アプリ側でユーザが権限を承認するときに表示されます。
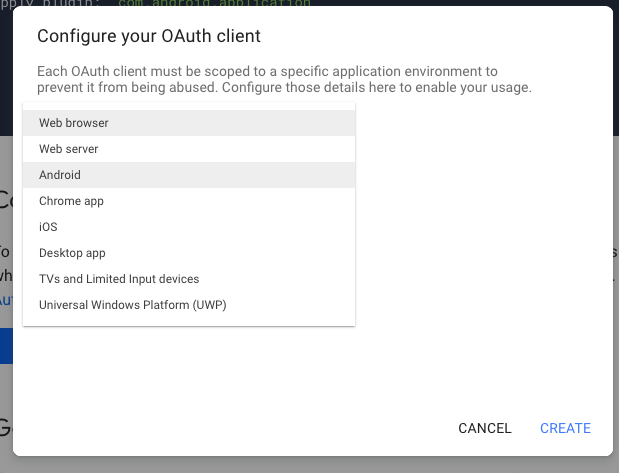
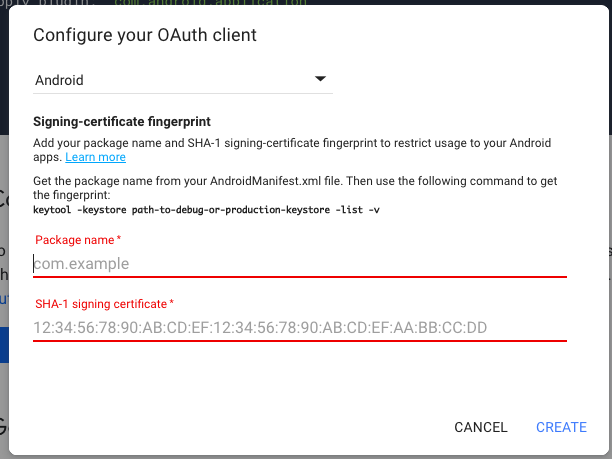
タイプはAndroidを指定します。
パッケージ名とSHA1を入力します。
次にGoogleSpreadsheetにアクセスするために
もう少し設定があるので頑張りましょう。
Spreadsheet APIの追加
以下のサイトにアクセスします。
https://console.developers.google.com/apis
先ほど作ったプロジェクトのダッシュボードを開きます。
左側のメニューからライブラリを開きます。
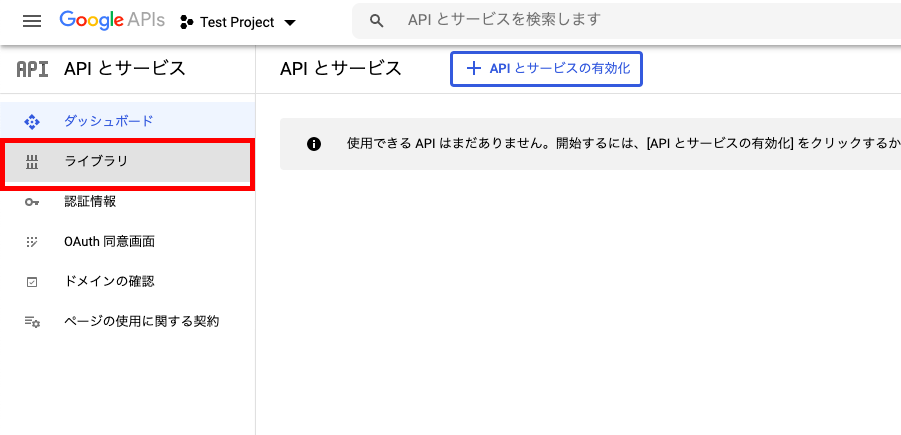
Spreadsheetと検索するとお目当てのAPIが出てきます。
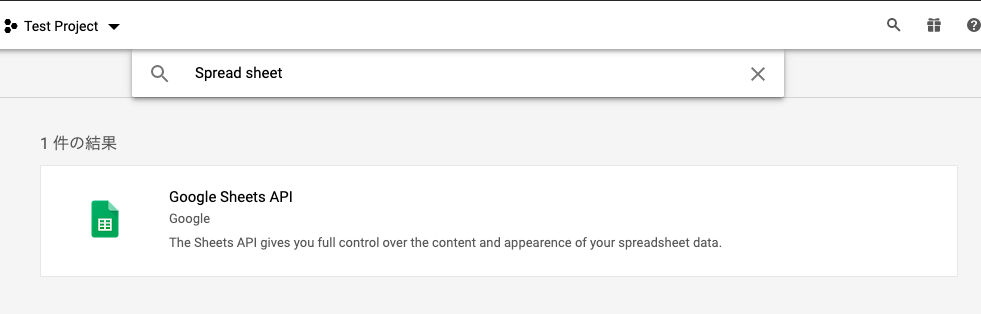
有効にするボタンを押して有効化しましょう。

これでAPI側の準備は完了です。
ここからはソースをいじっていきます。
build.gradleで依存性の設定
appレベルのbuild.gradleに以下の依存性を追加します。
API以外にもCoroutineを追加しておきます。
1 | dependencies { |
Manifestoファイル
インターネット利用の権限を追加してください。
1 | <manifest xmlns:android="http://schemas.android.com/apk/res/android" |
サインインボタンを作る
サインイン用のボタンを作ります。
他にも先を見据えて読み取り・書き込み・サインアウトボタンを作っておきます。
1 |
|
Googleにサインイン
MainActivityにサインイン処理を書いていきます。
コメントを多めに入れたので、細かい処理は説明しません笑
1 | class MainActivity : AppCompatActivity() { |
サインインボタンを押すとログイン用のダイアログが開きます。
読み込み
それでは読み込み処理を作っていきます。
onCreateメソッド内でクリックリスナーを設定します。
ネットワーク通信を行うので、coroutineを使用します。
1 | // 読み込み。ネットワーク通信なので、coroutine内で行う。 |
そしてreadメソッドを追加します。
1 | fun read(){ |
読み込めたでしょうか?
書き込み
書き込みも同様です。
クリックリスナーを指定します。
1 | // 書き込み。ネットワーク通信なので、coroutine内で行う。 |
関数を追加します。
1 | fun write(){ |
うまく動くとこんな感じでボタンを押すとSpreadsheetに
データが書き込まれます。
サインアウト
ついでにサインアウトの機能をつけておきます。
クリックリスナー追加
1 | // サインアウト |
関数を追加します。
1 | private fun signOut() { |
これは簡単ですね。
まとめ
今日はGoogle Spreadsheetへのアクセスを例に
Google APIにアクセスする方法を紹介しました。
GoogleAPIを利用したアプリを作成するときは参考にしてみてください。
ちなみに今回作成したプロジェクトはGitHubからダウンロードできます。
https://github.com/karintomania/GoogleSpreadsheetTest
それじゃ今日はこの辺で。
ところで…
仕事で扱っている技術がレガシーだったり、同じことの繰り返しだったりで
最近、成長してないと感じてませんか?
転職することで、もっと成長できるかもしれません。
いますぐ転職しない人でも、とりあえずエージェントに登録しておいて
案件や年収を眺めるだけでも市場の需要を知ることができ、勉強になります。
ここでエンジニアに人気の転職サイトを紹介します。
レバテックキャリア
エンジニアとして働いていて実務経験があるなら、
求人数の充実具合からレバテックキャリアがおすすめです。
IT転職ではデファクト・スタンダードですね。
▼レバテック キャリア 登録はこちら▼![]()
Tech Clips
Tech Clipsは年収500万以上&自社サービスを持った会社に特化した求人サイトです。
首都圏限定になってはしまいますが、
収入を増やしたい、自社サービスを持った企業への転職をしたい人におすすめです。
関連記事
こちらの記事もおすすめです。